Oftentimes, PC cable management is neglected, while it’s essential to assure optimal efficiency and performance of your computer. The criticality of constructing an organized and methodical system cannot be understated. This means getting your cables organized and managed in such a way as to maintain the neatness of your PC case and ensure proper airflow.
That’s why PC cable management is so important. Not only does it keep everything organized, but it also has the added benefits of improving ventilation, allowing easier access to components, and making sure that no cables are damaged or tangled. Let’s look at some steps you can take to achieve proper cable management.
What Choice Should You Make?
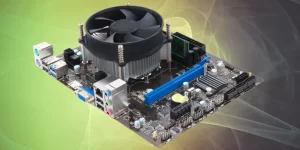
PC Case Selection
Choosing the right PC case for cable management is key to keeping your PC clean and organized. The first step when selecting a PC case is to ensure it has a separate cable management compartment, normally located on the right side, behind the PC case. This section should provide ample space for routing cables and hiding them away from view. It should also have openings big enough for large connectors like 24-pin power connectors. If you’re planning to use a lot of cables, look for cases with additional cable routing holes throughout the interior that can be used in conjunction with the main compartment.

When selecting a case, make sure it’s large enough to contain all your components and still leave some room for cabling. If you opt for a smaller case, you won’t be able to tuck away as many cables and they will end up cluttering the interior of your system. Internal cable management also requires vertical space behind the motherboard tray so that you can hide excess cabling without blocking airflow or interfering with other components in your system.
RELATED: Desktop PC Case Size

Many cases are now being designed specifically with cable management in mind, offering features such as adjustable grommets on the back panel for convenient access to power connections, pre-built panels to route cables behind the motherboard tray or through holes at different angles, rubber grommets around cutouts to protect wiring from fraying and more. Look for these features when narrowing down your options so that you don’t have to spend too much time managing cabling inside your system once it’s built.
Power Supply Unit
When selecting a Power Supply Unit (PSU) that supports cable management, it is important to consider the size of the PSU, wattage requirements, and the number of cables.
The PSU you choose for your PC case is extremely important. Essentially, the size of the PSU should match your computer case. Take a look at what kind of tower case you have, such as mid-tower or full-tower. ATX form factor is a common size for most PC cases. For some smaller models like mini-tower (micro-ATX) or SFF (Mini-ITX) PC cases, you may have to choose the SFX PSU as specified by the manufacturer.
However, the real challenge doesn’t come in the size, but in how much power it provides for all of your pc components. To ensure that you are successful in this mission and that all components will be economically powered for peak performance, use an online power supply calculator to find out how many watts your system needs from any type of power supply.
Once you have chosen a suitably sized and powered PSU, look out for models that feature modular cabling. This allows users to select which cables they will require and attach them as needed. Fully-modular PSUs are particularly useful when building custom PCs as it helps to reduce clutter within the case without compromising on performance or cable length.
If you’re looking to save some money, semi-modular power supplies are an excellent option as they come with fixed cables like 24-pin ATX and 8-pin EPS connectors.
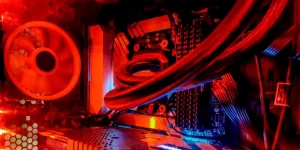
Furthermore, the color cables are the perfect options for cable management as they can be arranged in a visually pleasing way and easily match your PC’s interior lighting. When combined with liquid cooling or RGB lighting, it is possible to create a striking look that turns heads.

Finally, it’s worth researching reviews from other users before purchasing a PSU to find out how well-supported specific models are in terms of cable management features. Additionally, research any known compatibility issues with different motherboards or graphics cards so you know what you’re getting into beforehand.
Steps for Your PC Cable Management
IMPORTANT NOTES:
- If you manage cables in an existing PC, you need to turn off the power before opening the PC case.
- Use anti-static wrist bands when manipulating to prevent electrostatic shock (ESD) from damaging your components.
Essential Tools and Devices for PC Cable Management
Screwdriver and Wire Cutter
A screwdriver may be necessary when installing proper mounting brackets or wall plates for your cables. It is important to have the right size screwdriver so that you don’t damage any components during installation. It’s important to always use screwdrivers of the correct length so that they remain firmly attached even in hard-to-reach places.
A wire cutter is an essential tool for cutting zip ties, which are often used to bundle multiple cables together. When using it, be sure to hold the wire cutter firmly and keep it angled away from your body so as not to injure yourself or damage other objects nearby.
Zip Ties:
One of the most important tools for cable management is a good set of zip ties. These small plastic straps can be used to tie several cables together and keep them neat and tidy. They come in a variety of sizes and colors and sometimes they are included with the PC case.
Velcro Straps:
Another great option for cable management is Velcro straps; they come in various sizes so they can fit around different types of cables of varying thicknesses without slipping off or becoming loose over time. As same as zip ties, velcro straps may come included with the PC case.
Check the Position of Components
The first step in managing PC cables is to check the position of all components. This includes the power supply, motherboard, graphics cards, hard drive, and any other internal components. Ideally, you should place these components where they will be least likely to cause cable clutter or obstruct airflow inside the computer. This can help reduce cable congestion and allow air to flow more easily.
When checking a location for each component, consider how far away they are from each other and how easy it will be to connect them with cables. Don’t forget to take into consideration the physical size and shape of your computer case when selecting component positioning. This is to ensure that you have enough space in order to properly wire up the components.
For example, will the GPU comfortably fit in the correct area and still allow ample space around it, ensuring that there is adequate room for all cabling? Measure everything carefully and try to account for any potential issues before settling on a solution. Moreover, when checking a location for each component remember that wiring up each component easily is most important. Making sure there’ll be plenty of clearance for cables, leaving no room for contingency problems down the line.
As you assemble your motherboard, it is essential to make sure that all front panel connectors are placed into their appropriate headers. Finally, if possible try and keep longer cables towards the back of the case while shorter ones towards the front to avoid hanging loose wires inside your system’s interior.
RELATED: How To Connect Your Motherboard’s Front Panel Connectors
Routing the Cables
Once you have mounted all of your components, it is time to route your cables. Begin by gathering together all the grouped and separated cables for each component. Be sure to make sure they are not twisted together for a neat, tidy look. Now align the cables across each other so you can easily understand which components of your setup require specific cables. Finally, double-check your configurations, so you know everything’s where it should be.
Plugging the cables into the correct ports is vitally important to avoid complications in your PC. It’s essential that cables are secured once plugged in to prevent them from getting disconnected due to excess movement. One way to bundle them up and reduce clutter is via zip ties or velcro straps, which should be securely where they can keep the connected cords organized without loosening any of them. By utilizing these methods you can easily keep major messes at bay and make sure that each port is used in order to optimize the overall performance of your machine.
Be sure to leave enough slack in each cable to ensure their longevity and easy handling when replacing or repairing in the future. After routing all of the cables correctly, it is time to close up your PC case and enjoy its newly organized interior.
Conclusion
PC cable management is an essential part of any PC setup, especially a high-performance gaming rig. It keeps everything running smoothly by optimizing airflow within the system while also creating an aesthetically pleasing environment for gamers.
With just these few simple steps outlined here, selecting the right components, proper placement of components within the case, and handling each cable individually while keeping airflow in mind, you can ensure your system runs efficiently while also making it look great. No matter if you’re building your first machine or refreshing an old one, these tips will help get you up and running quickly with minimal stress involved.